How to accept payments on your own website?
Through your website, you can sell presets, tutorials, courses, workshops, photo sessions, or any other services and digital products.
Payments are processed through third-party payment systems. Pixover is not involved in financial transactions and does not charge any commission — funds go directly through the service you choose.
What do you need?
You need a Payment Link (or Checkout Page) feature.
In the payment system, you can create a list of your products — for example, presets, workshops, photo sessions, or other services. A separate payment link is created for each product, which the client uses to complete the purchase.
This link is what you add to the "Buy", "Pay", or "Book" button on your website.
Payment Links are supported by many e-commerce services, for example: WayForPay, Stripe, Lemon Squeezy and others.
They allow you to create payment links for your products and configure post-payment actions — redirect after successful payment, automatic email notifications, and more. Choose a payment system that is available in your country and suits your needs.
How does it work?
The client visits your website, reviews the information about a product or service, and clicks the "Buy", "Pay", or "Book" button.
They are then redirected to the payment system's checkout page, complete the payment, and finish the purchase.
After that, the client can be automatically redirected to a page of your choice (which you configure in the payment system for that Payment Link) — for example, a thank-you page, a file download page, or a product access page.
All payment and client information is stored in your payment system dashboard.
How to add a Payment Link to your website?
Once you have created a checkout page in the payment system, copy the generated Payment Link.
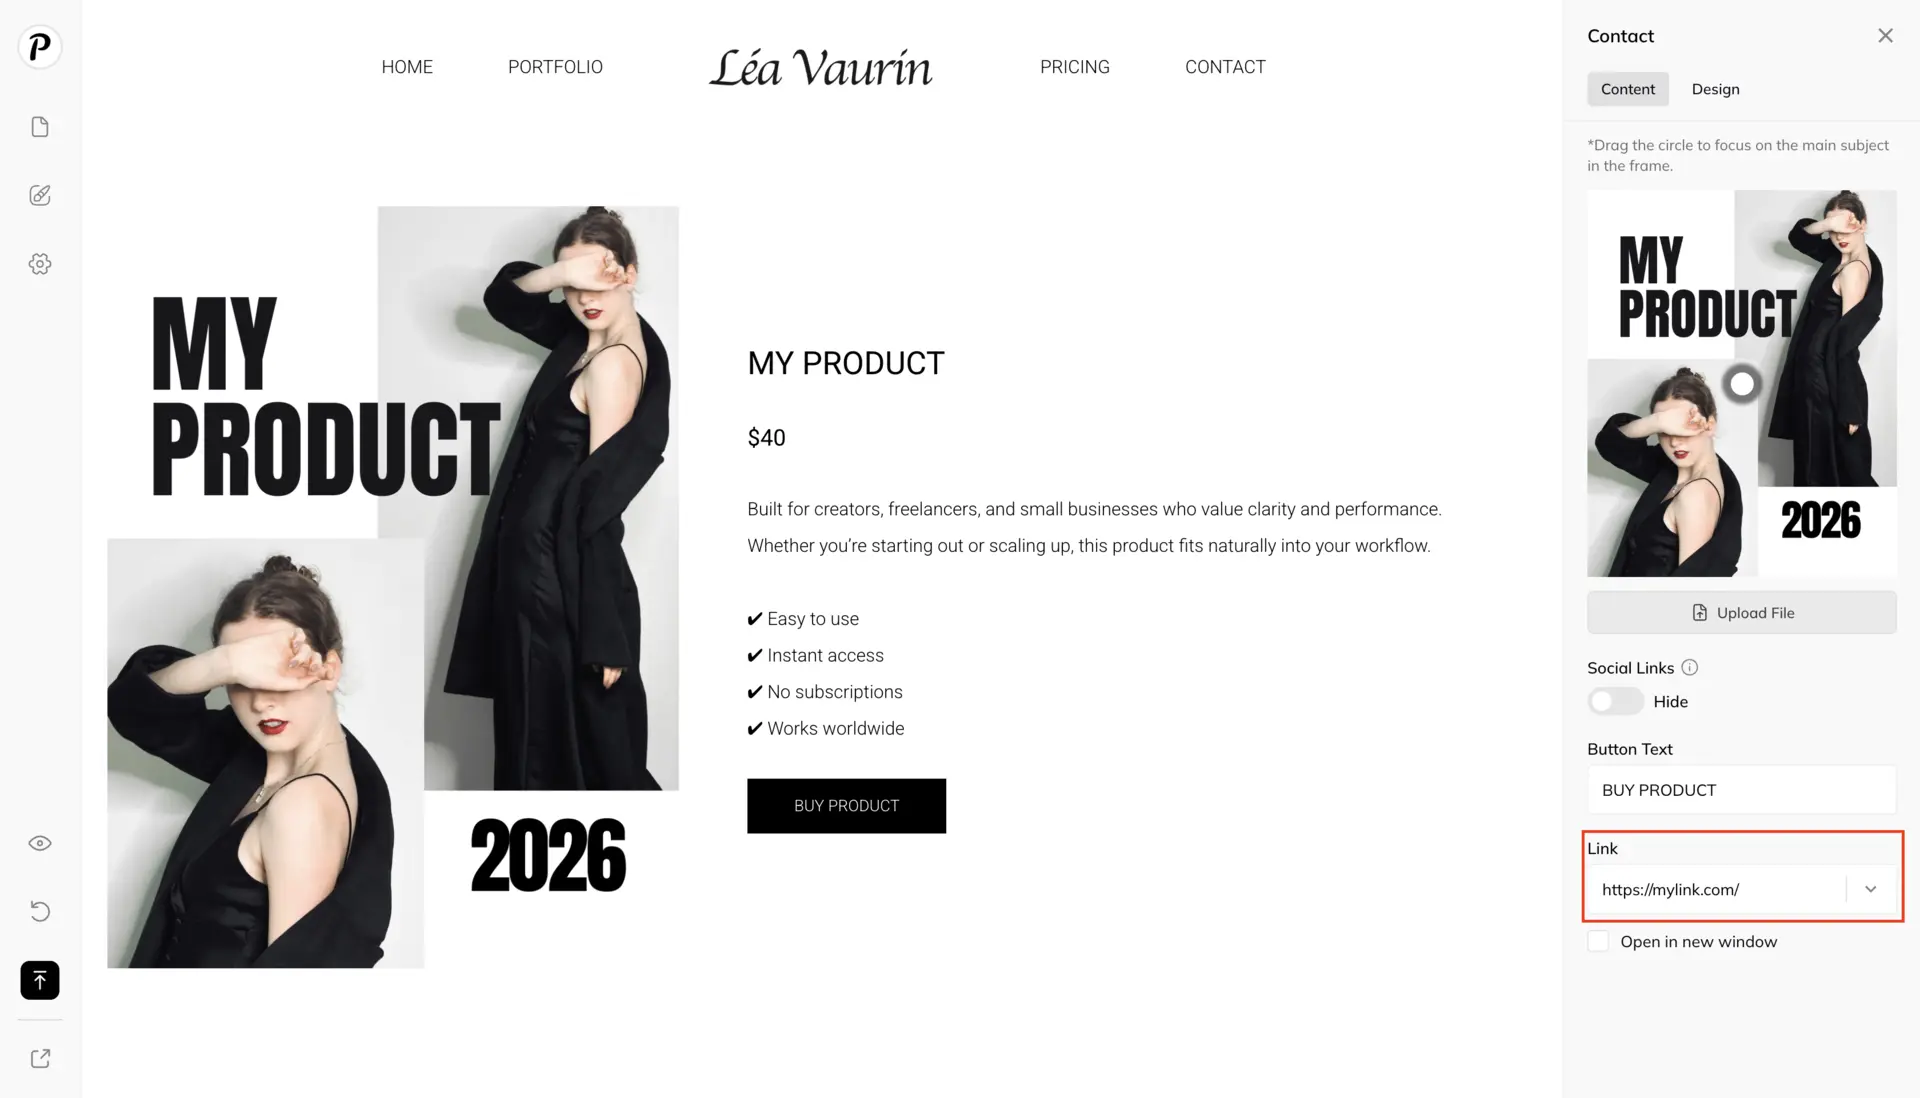
In the Pixover website builder, you can insert this link into any block that supports adding links:
- In text blocks — select the desired text, click the "Link" icon in the editor, and paste the Payment Link. The text will become clickable.
- In the "Contact" block (the design variant with a button), you can insert the link into the button.
- Or add a separate "Button" block and insert the Payment Link there.
Before adding the link, set up your product page or block: describe what you are selling, what is included in the service or product, and add the price as text so the client can see the details before proceeding to checkout.
After making changes, don't forget to publish your website for the updates to take effect.
This way, you can create a booking page for a photo session so that clients can pay a deposit or the full amount online through the payment system, without separate bank transfers.
You can also sell presets, courses, or other products. It's fast, convenient, and you can update the information or add new offerings at any time.